Blueprints
This section shows how to use the plugin to create a WebSocket server in Unreal Engine using Blueprints and listen for client WebSockets.
Creating a WebSocket Server
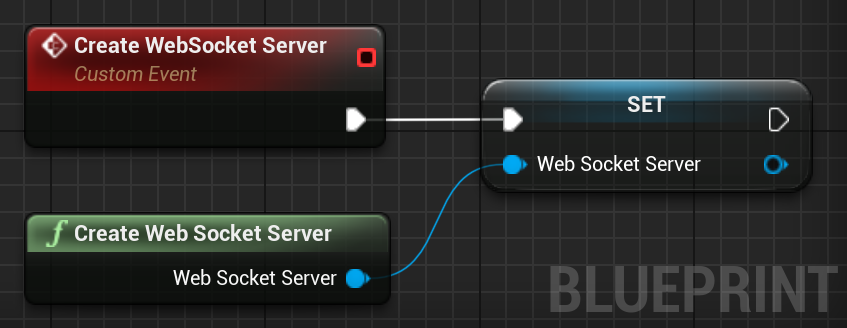
To create a WebSocket Server, call the CreateWebSocketServer node.
Make sure to store the result in a variable to prevent it from
being garbage collected.
Creating a Secure WebSocket Server
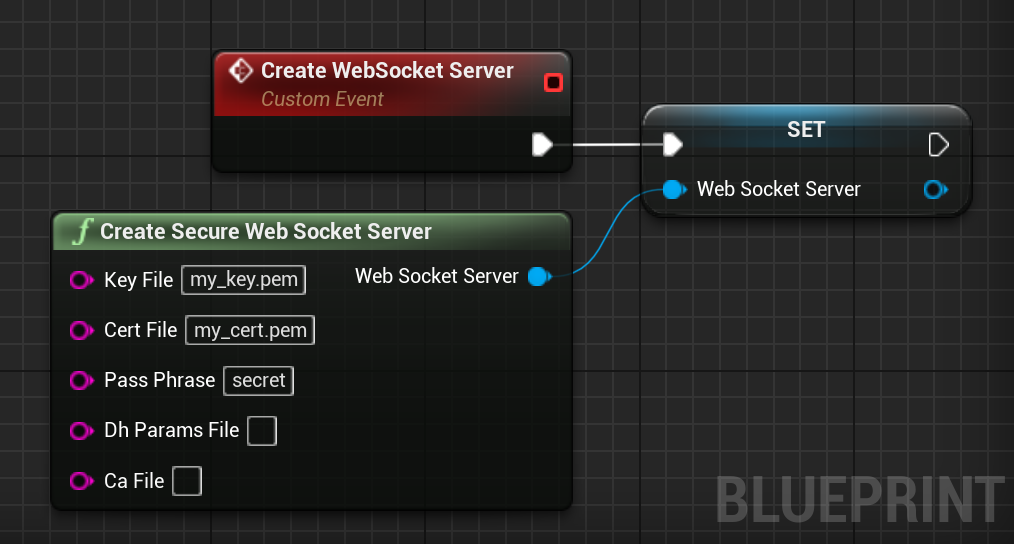
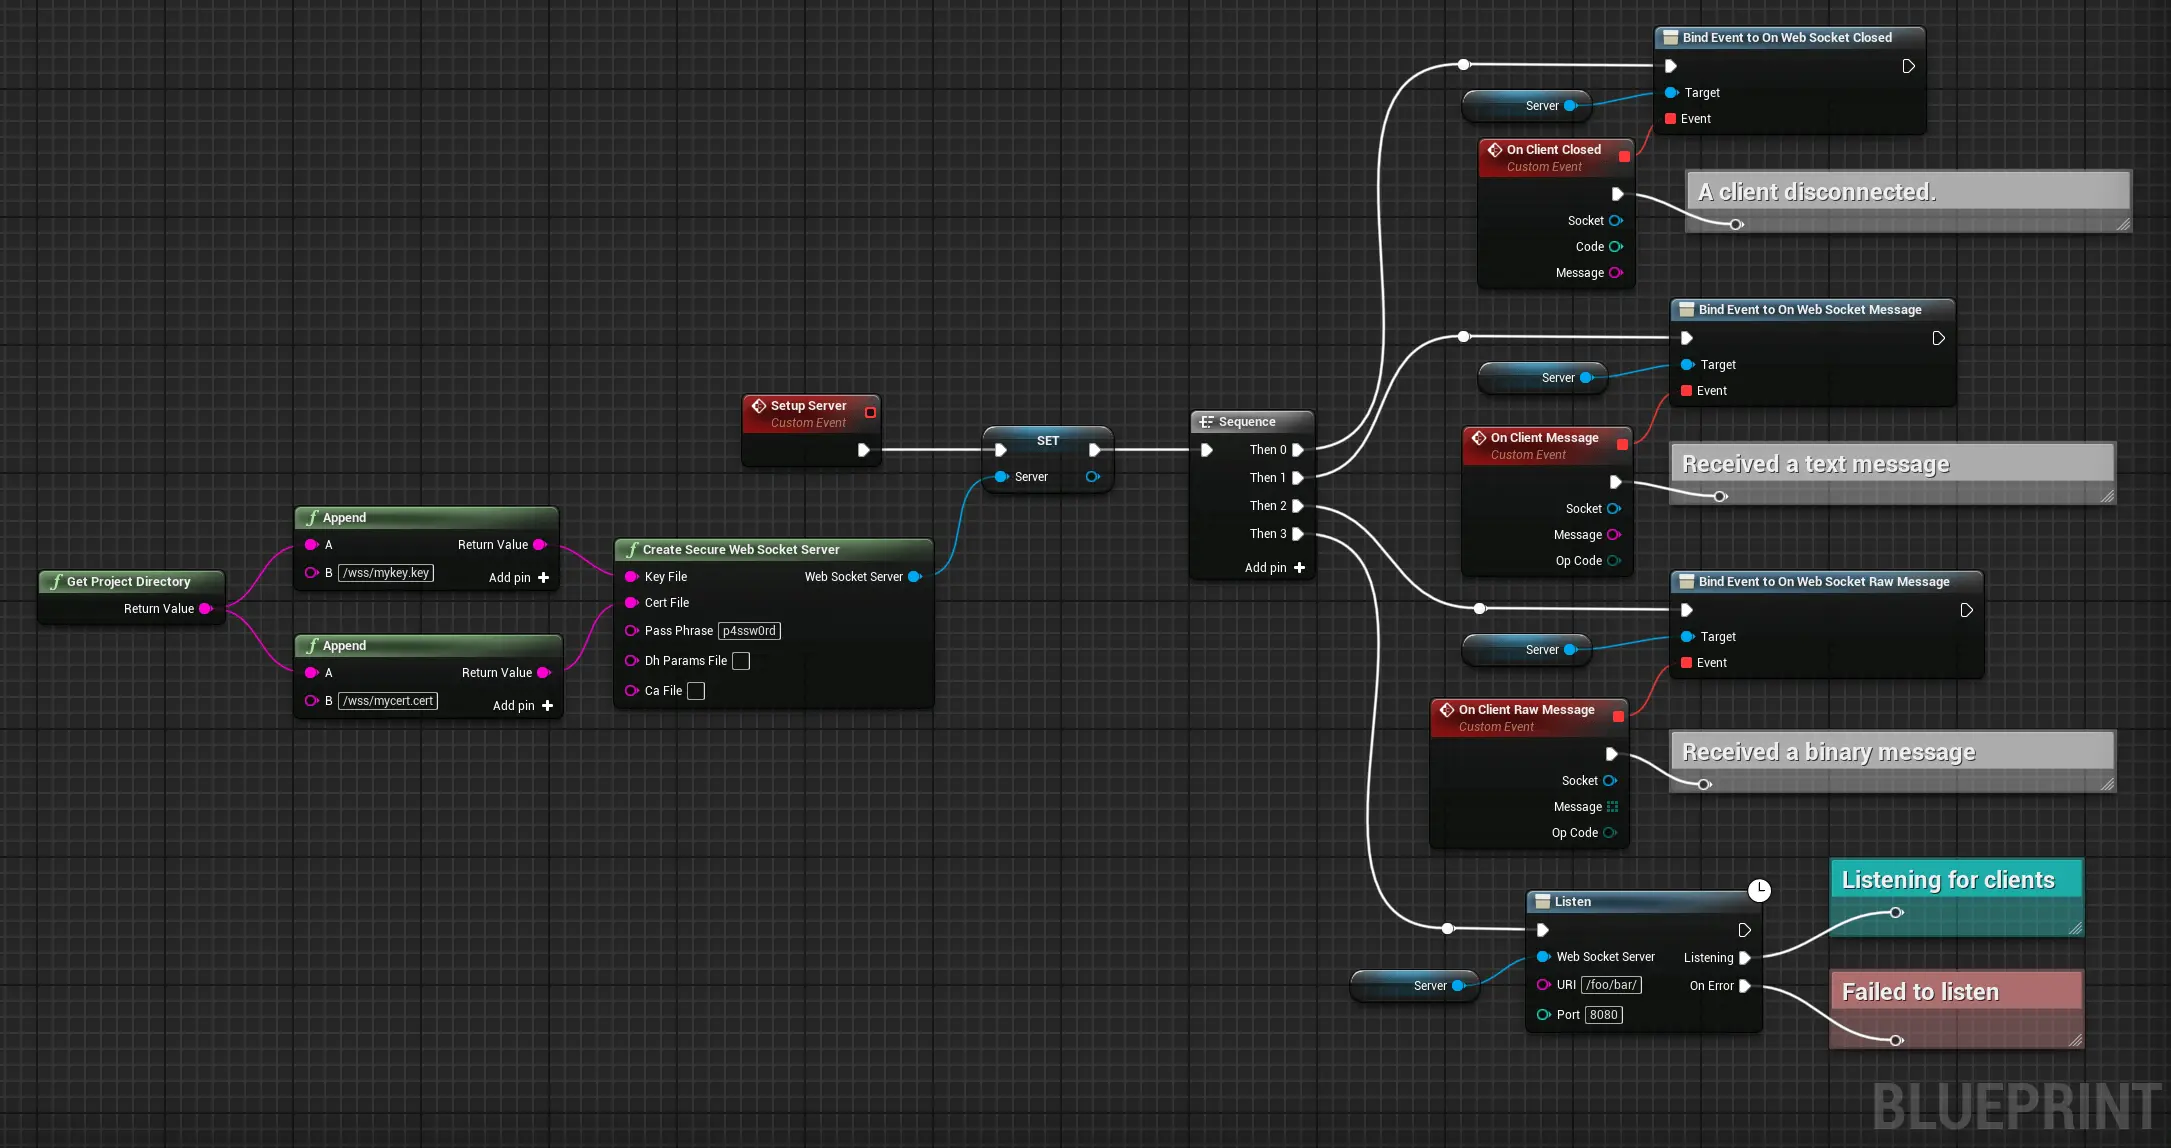
To create an WebSocket Server with WSS, call the Create Secure WebSocket Server node.
This node takes 5 parameters:
- Key File: The location of the private key for our WSS Server on disk.
- Cert File: The location of the certificate for our WSS server on disk.
- Dh Params File: An optional DH parameters file.
- CA File: An optional CA file.
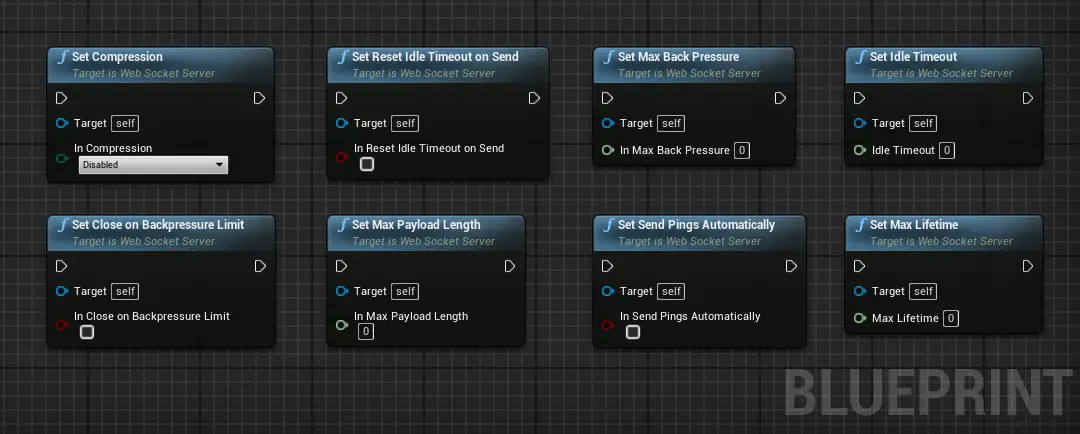
Configuring the Server.
Now that the server is created, you can configure your server. The following nodes are available:
Handling Events
A WebSocket Server offers several events to interact with clients.
The following image shows the events you can bind.
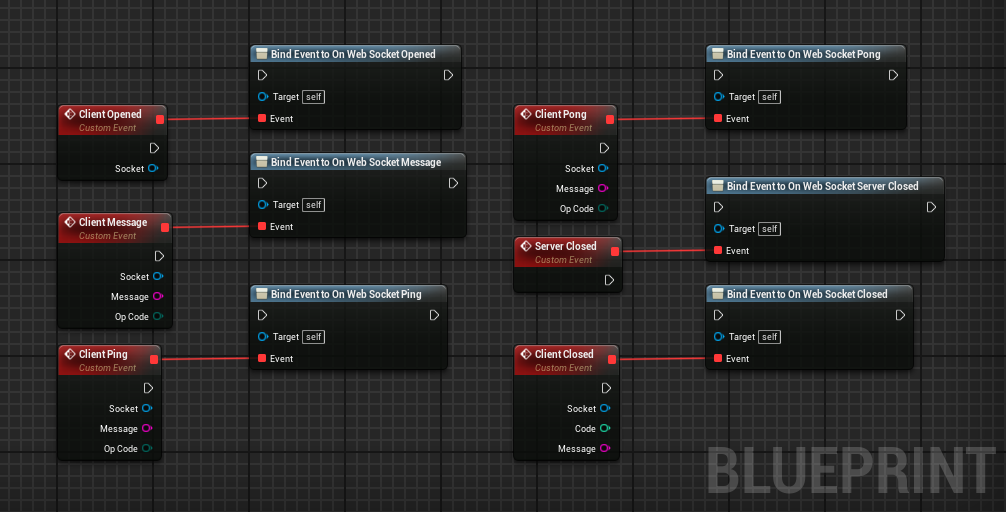
You must bind the events before calling the Listen node.
Listening for Clients
Once the events are correctly setup, it's time to start listening for WebSocket client connections.
The Listen node takes two parameters:
- URI: The location where to reach the WebSocket Server. It supports dynamic routes (i.e.
/path/:id/*for/path/{number}/*). - Port: The port were the server will be available.
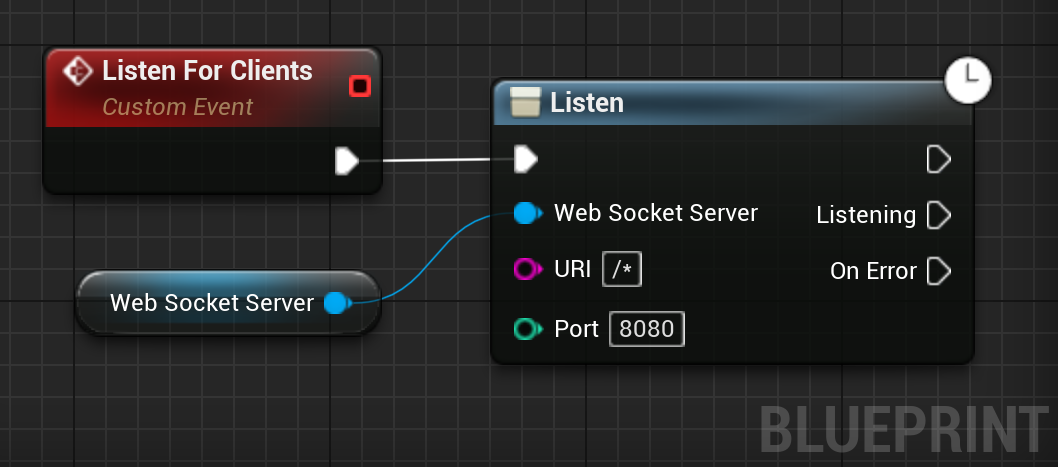
Make sure to start your URI by a forward slash (/)
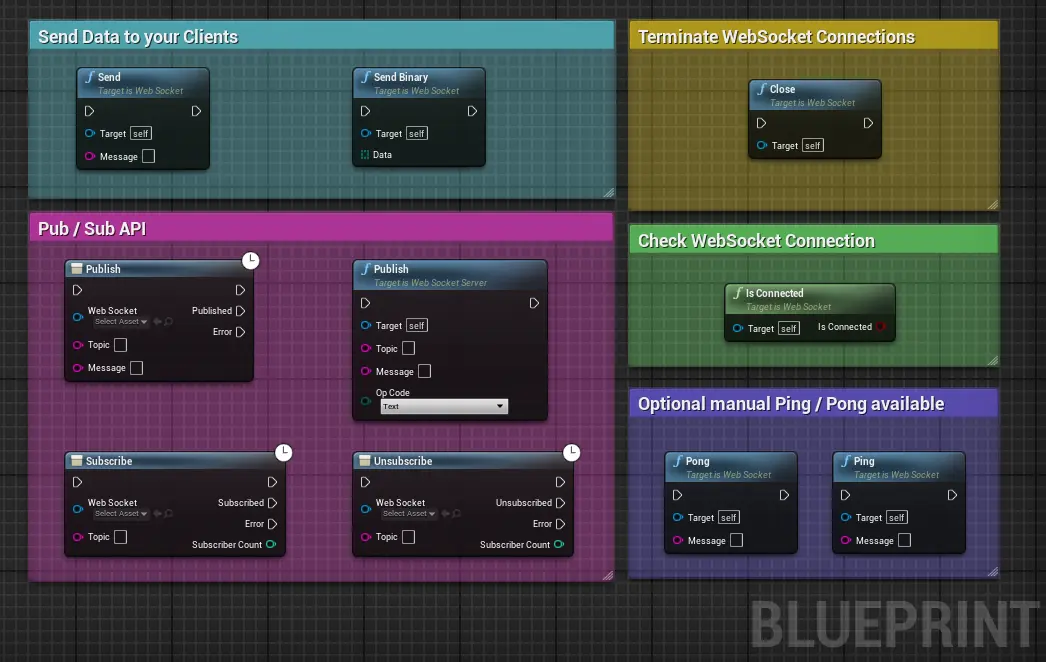
Interracting with your Clients
Now that the server listens and accepts new connections, you can communicate with your clients. To do so, the following nodes are available:
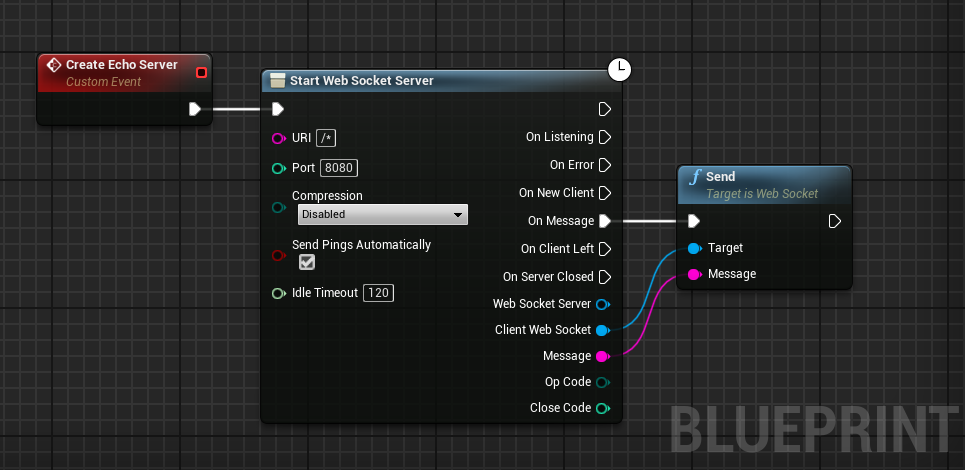
Echo Server Example
The following example shows how to create a simple echo server. It uses an helper node that creates, binds and configures the server under the hood.
Advanced Server Example
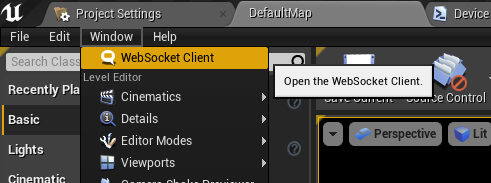
Client for Testing
If you want to test your server with a client, you can use the client included in the plugin.
To open it, go to Windows > WebSocket Client.